Introduction
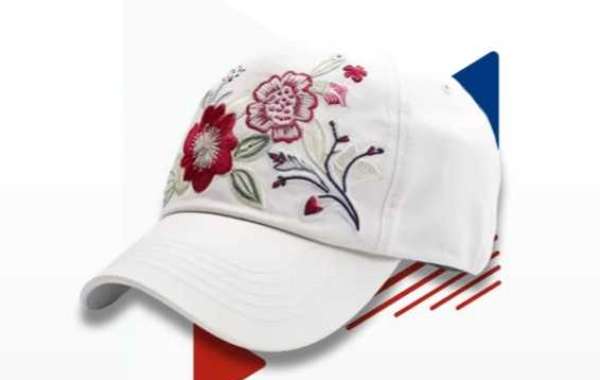
If you've ever tried embroidering on a hat, you know it’s not like working with flat garments like t-shirts or hoodies. Hats are curved, structured, and often have seams that make embroidery a little trickier. That’s why one-size-fits-all designs don’t always work and why hat embroidery digitizing is a skill all its own.
Whether you're stitching logos on snapbacks, trucker caps, or beanies, proper digitization is the key to crisp stitching, perfect placement, and professional results. In this guide, we’ll walk you through what makes hat digitizing different, what to look out for, and how to get flawless designs every time—without the guesswork.
What Does It Mean to Digitize for Hat Embroidery?
At its core, digitizing means converting an image (like a logo or custom design) into a format your embroidery machine can understand. But digitizing for hats takes this process a step further. It’s not just about converting an image—it’s about tailoring the stitch pattern specifically for the curved and structured surface of a hat.
That includes:
- Adjusting stitch directions for the natural arc of a cap
- Reinforcing underlay stitching to prevent distortion
- Choosing the right stitch types for text and logos
- Managing density to account for thicker materials like twill or foam
The end goal? Clean, legible, and centered embroidery that doesn’t warp or shift when stitched onto a hat.
Why Hat Embroidery Is So Tricky
You might be wondering—why all the fuss? Why can’t you use the same file you’d use for a polo shirt?
Here’s why hat embroidery needs special treatment:
1. Curved Surface
Hats aren’t flat, so stitch tension is different. Designs need to follow the curve without distorting.
2. Limited Stitch Area
Most cap frames only allow for around 2.25" in height on the front panel, so space is tight—especially for vertical logos or lots of text.
3. Seams and Panels
Center seams or thick front panels can cause needle deflection or thread breaks if not digitized carefully.
4. Cap Styles Vary
A design that works on a structured cap might not stitch well on a beanie or low-profile dad hat. Each style may need tweaks.
That’s why it’s essential to digitize your design specifically for hats, not just for general embroidery use.
Key Elements of a Hat-Optimized Embroidery File
So what does a well-digitized hat embroidery file look like? Here's what the pros always include:
Center-Out Stitching Order
Hats are stitched from the center outwards to minimize fabric shifting and puckering. Digitizers plan the design to start in the middle and move outward on each side.
Sturdy Underlay
A strong underlay stabilizes the design, helps manage stitch density, and keeps outlines from pulling out of shape—critical on thick cap fabrics.
Short, Dense Stitches
Long satin stitches tend to snag on hats. Proper digitizing uses shorter, tighter stitches that hold their shape on curved surfaces.
Pull Compensation
This accounts for the natural pull of threads during stitching, especially on hats where tension can skew alignment.
Simplified Design
Intricate details and tiny text often get lost on caps. Good hat digitizing simplifies designs without losing clarity.
When You Need Professional Hat Digitizing
While embroidery software gives you the tools, experience is what makes the difference. Many crafters and businesses choose to outsource hat digitizing because:
- It's more efficient
- Results are more consistent
- It eliminates guesswork and testing
If you’re running a custom embroidery business or selling hats online, quality digitizing can make or break your product. And if you’re just starting out, it saves you hours of trial and error.
Your Go-To Source for Hat Embroidery Digitizing
We specialize in digitizing for hats—from classic baseball caps to flat brims and everything in between. Our team knows how to craft files that stitch perfectly on curved surfaces with crisp lines, solid fill areas, and no distortion.
What You Get:
- Expert digitization tailored to your cap type
- Clean, professional stitching every time
- Center-out optimized stitching paths
- Fast delivery—usually within 24 hours
- Multiple formats available (DST, PES, EXP, etc.)
And yes—we include free minor edits, just in case you need adjustments after your first test stitch.
How It Works
Our process is simple and built for speed and quality:
1. Upload Your Design
Send us your logo or image (JPG, PNG, AI, or PDF).
2. Specify Hat Type & Size
Let us know what kind of hat you’re working with, the stitch area, and whether the cap is structured, unstructured, or uses foam.
3. We Digitize It
Our team creates a file optimized for your machine and hat style, using all the best practices for curved surfaces and tight areas.
4. Download & Stitch
We deliver your file via email—ready to load and embroider.
Real-World Results
“I used to waste hours trying to make my flat embroidery files work on hats. These guys digitized my logo specifically for a snapback, and the difference was night and day—crisp edges, no distortion, perfect fit.”
— Jordan B., Streetwear Brand Owner
“Every time I get a cap digitized here, it stitches beautifully. They know hats better than anyone I’ve worked with.”
— Maria K., Embroidery Shop Owner
Pro Tips for Embroidering on Hats
Even with a perfectly digitized file, a few best practices can improve your results:
- Use the right stabilizer: Tear-away or cap backing is ideal for structured hats.
- Secure the cap tightly: Any shifting will ruin alignment—use proper cap frames and clamps.
- Test on a blank first: Always do a test run to catch any machine quirks or tension issues.
- Mind the thread tension: Tighten slightly to compensate for the thicker front panel.
Frequently Asked Questions
Can I use the same design for shirts and hats?
Not ideally. Designs for hats need different stitch directions, underlay, and sizing. We recommend separate files for best results.
What file formats do you provide?
We deliver DST by default (used by most commercial machines), but also offer PES, EXP, JEF, VP3, and others.
What’s the turnaround time?
Standard turnaround is 24 hours or less. Rush orders can be delivered same day—just let us know.
How much does it cost?
Most hat digitizing jobs start at $15, depending on the complexity. No hidden fees or subscriptions—just flat-rate pricing.
Ready to Digitize for Hat Embroidery?
If you want your hats to look sharp, professional, and clean every time, don’t leave it to chance. Our expert digitizers deliver flawless embroidery files for caps—with the perfect stitch order, density, and design adjustments built-in.