Introduction: Why File Conversion Matters in Embroidery
In the world of machine embroidery, precision is everything. A great design doesn’t just depend on the creative artwork—it also hinges on the file format you use. If you're using a Pfaff embroidery machine, the PXF format is your best friend. But what if your original design is in PES format? That’s where From PES to PXF: How to Convert Designs Perfectly and the right PXF File Converter become essential tools in your embroidery arsenal.
Whether you're a hobbyist upgrading to a Pfaff machine or a professional digitizer managing files for multiple clients, using a reliable PXF File Converter ensures your designs are transformed accurately. Converting designs properly is the difference between clean, crisp results and embroidery nightmares.
Let’s break down the tools, steps, and expert tips that make PES to PXF conversions easy and effective.
What Are PES and PXF Files?
PES Format: Common but Not Universal
PES files are widely used in the embroidery community, especially among Brother and Baby Lock machine users. These files store data about the design—like stitch paths, thread colors, and needle positions.
However, PES files are not optimized for Pfaff machines, meaning you could miss out on specialized features and precise stitching.
PXF Format: Designed for Pfaff Precision
PXF files, on the other hand, are native to Pfaff embroidery software and machines. They offer enhanced features like:
Machine-specific stitch calibration
Detailed hoop alignment
Advanced tension control
Access to Pfaff-exclusive decorative stitch types
When using a Pfaff machine, converting to PXF ensures you're getting the best out of both your design and your hardware.
From PES to PXF: How to Convert Designs Perfectly
Step-by-Step Guide to Flawless Conversion
If you're wondering how to take a PES file and convert it to PXF without losing quality, here's your roadmap:
1. Choose the Right Software
You’ll need embroidery software that supports both PES and PXF formats. Some popular choices include:
mySewnet Embroidery Software (formerly known as Premier+): Offers direct import/export for PES and PXF.
TruEmbroidery (Mac users): Handles both formats, though with limited features.
Wilcom: Advanced, but may require third-party plugin support for PXF.
Embird with appropriate modules: Supports a wide range of formats and can export to PXF with additional configuration.
Pro Tip: Always check if your software is updated. Older versions might not support new format features.
2. Open the PES File
Load your PES file into the software. Review the imported design to ensure all elements (stitches, colors, alignment) appear correctly.
3. Adjust Design Parameters
Before exporting, take time to:
Adjust stitch density for Pfaff compatibility
Set thread colors based on Pfaff’s thread library
Reposition design for your specific hoop size
Optimize stitch order to reduce thread changes
4. Save as PXF
Once your edits are done, select “Save As” or “Export,” and choose PXF as your format. Rename the file as needed and save it to your preferred directory.
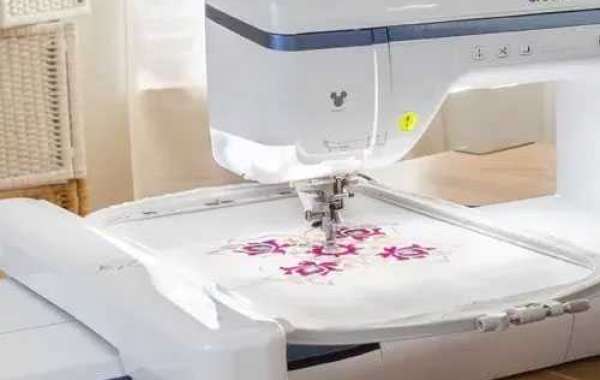
5. Test Stitch Before Final Use
Before using the converted design on your final garment or product:
Do a test stitch on scrap fabric
Check for alignment, color accuracy, and stitch performance
Make final tweaks if needed
Why the Right Software Matters in PES to PXF Conversion
Features to Look For
Not all embroidery software is created equal. For seamless PES to PXF conversion, look for software that offers:
Multi-format compatibility (including PES, PXF, DST, JEF, etc.)
Object-based editing
Advanced stitch simulation
Thread color libraries (e.g., Isacord, Madeira)
Custom hoop size options
Choosing robust software will save you hours of rework and frustration.
Common Pitfalls in PES to PXF Conversion
What to Watch Out For
Even with good software, mistakes can creep in. Here’s what to avoid:
Skipping the test stitch: Always test before committing to production
Ignoring hoop limitations: Make sure your design fits within your hoop
Overlooking stitch direction: Some designs may require manual tweaking after conversion
Wrong thread charts: Using the wrong colors can ruin design accuracy
Expert Tips to Perfect Every Conversion
Tricks from Professional Digitizers
Professionals know that small changes can make a big difference. Here are some insider tips:
Use foam underlay for bold 3D elements
Vary stitch angles to add depth and prevent fabric distortion
Optimize stitch order to reduce jump stitches and trims
Save master files before each conversion so you can go back if needed
Document successful machine settings for repeat use
The Pfaff Advantage: Why PXF Is Worth the Effort
PXF files do more than just “work” with Pfaff machines—they enhance your embroidery. By converting to PXF, you unlock:
Precise tension control
Optimized stitching paths
Seamless hoop alignment
Pfaff-exclusive decorative elements
Using PXF gives you full control over every detail of your design, making it a professional’s go-to choice for Pfaff hardware.
Bonus: Online Conversion Tools – Are They Reliable?
There are free or paid online tools that promise PES to PXF conversion, but proceed with caution. Most lack:
Manual editing features
Thread library accuracy
Proper hoop calibration
If you do use an online tool:
Upload a high-quality PES file
Choose PXF as the output format
Adjust basic settings (if allowed)
Download and test stitch before final use
For critical jobs, stick with professional-grade software.
Conclusion: Ready to Convert Like a Pro?
Converting embroidery designs isn’t just a technical task—it’s a creative decision that impacts the quality of your work. As this guide From PES to PXF: How to Convert Designs Perfectly has shown, using the right tools, avoiding common mistakes, and applying expert tips can ensure your converted designs stitch beautifully on Pfaff machines.
Whether you're digitizing for clients or crafting your next masterpiece, mastering the PES to PXF conversion process is a skill that pays off in every thread.